It’s been over a year and a half since I posted about my development setup. A lot has changed since then so I decided it was time to provide an update. The most drastic change is that I’ve dropped TextMate, Sublime, and Atom and finally took the plunge into the world of Vim and Tmux and, so far, I have been very impressed with the results.
Swap Ctrl and Caps Lock!
This is very important. Seriously. A lot of the commands and actions that I mention below use Ctrl-A and Ctrl-(Vim movement keys). Swapping my Ctrl and Caps Lock keys allows my fingers to stay in the home row most of the time.
Vim + Tmux
This is my typical Vim + Tmux window setup when coding:
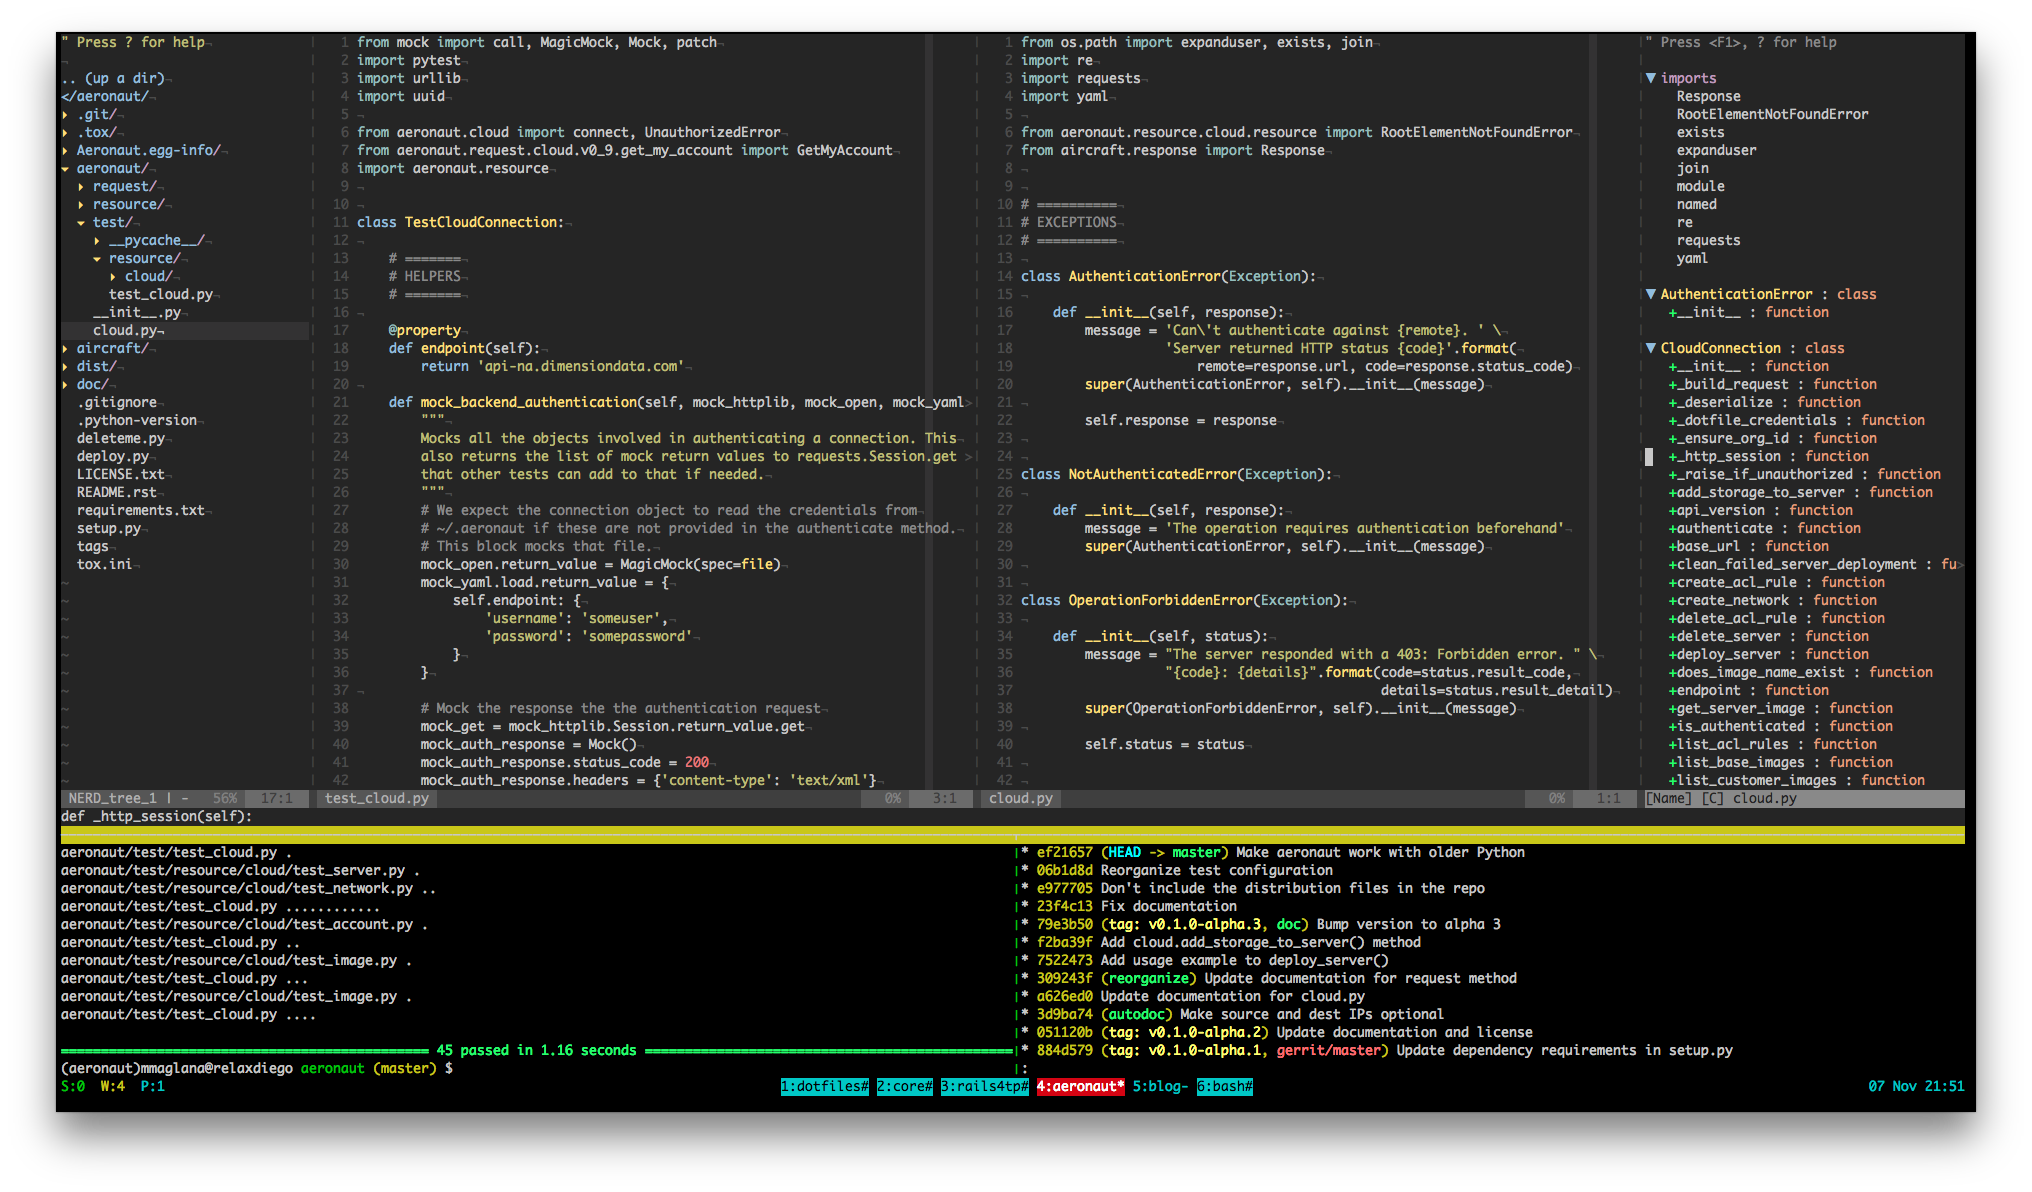
- I use Tmux panes to organize my tools for each project
- The top pane is Vim, split vertically. The left window is for tests, the right window is for code.
- I optionally use NERDTree which is visible on the left and Tag Bar which is visible on the right.
- The bottom left pane is where my tests get executed.
- The bottom right pane is for other shell stuff. Typically used for git.
Typical Vim Workflow
I use NERDTree to keep track of my project’s structure but really, for the most part, I’m just used to having a tree on the left side. I can easily toggle it by using <Leader>nt.
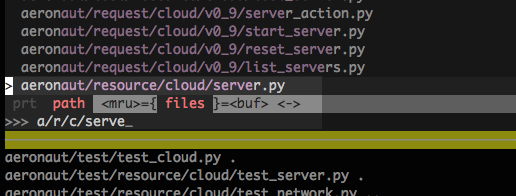
For quickly opening files, however, I rely more on the CtrlP plugin. I just hit Ctrl-p, do a fuzzy search, and hit Enter. For example, if I wanted to open the file ‘aeronaut/resource/cloud/server.py’, I just type ‘a/r/c/serve’ then press Enter and the file is opened.
If I want to quickly traverse the current code, I open up the Tag Bar, scroll to the definition I want to go to, then hit Enter and I’m there.
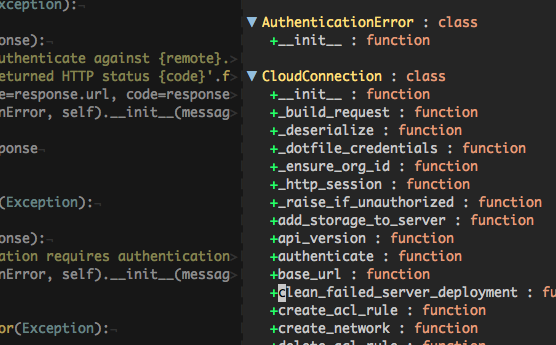
I also make use of Ctrl-] to quickly jump to a method definition if my cursor is already on top of a method call and Ctrl-T to come back. To make Tag Bar and Vim’s tag navigation work, I make use of Exhuberant Ctags to generate the tags file.
TDD
One of my favorite things about this new set up is that I’ve unified my TDD workflow for Python and Ruby. Whereas previously I used slightly different steps depending one the language, now I do exactly the same thing regardless of whether I’m coding in Python or Ruby. So how do I do it these days? Firstly I have my usual 3-pane setup. I have my tests on the left, and my code on the right. My workflow generally is this now:
- Write failing test
- Run <Leader>s which executes only the failing test
- Write code to pass the test
- Run <Leader>l which executes only the last failing test
- If the test still fails, repeat above steps
- If the test passes, <Leader>t to execute the current test file
- Optionally, run all tests with <Leader>a
Note that during this whole process, I never leave Vim. That’s because
I’m using Tslime.vim to send the commands to the lower left tmux pane.
What’s cool about Tslime is that it’s smart enough to know which test runner
to run depending on the files that it sees in my project. If it’s a Python
file, it will run py.test, if it’s Ruby, it will run rspec. I can also
easily configure it to run different test runners for certain projects.
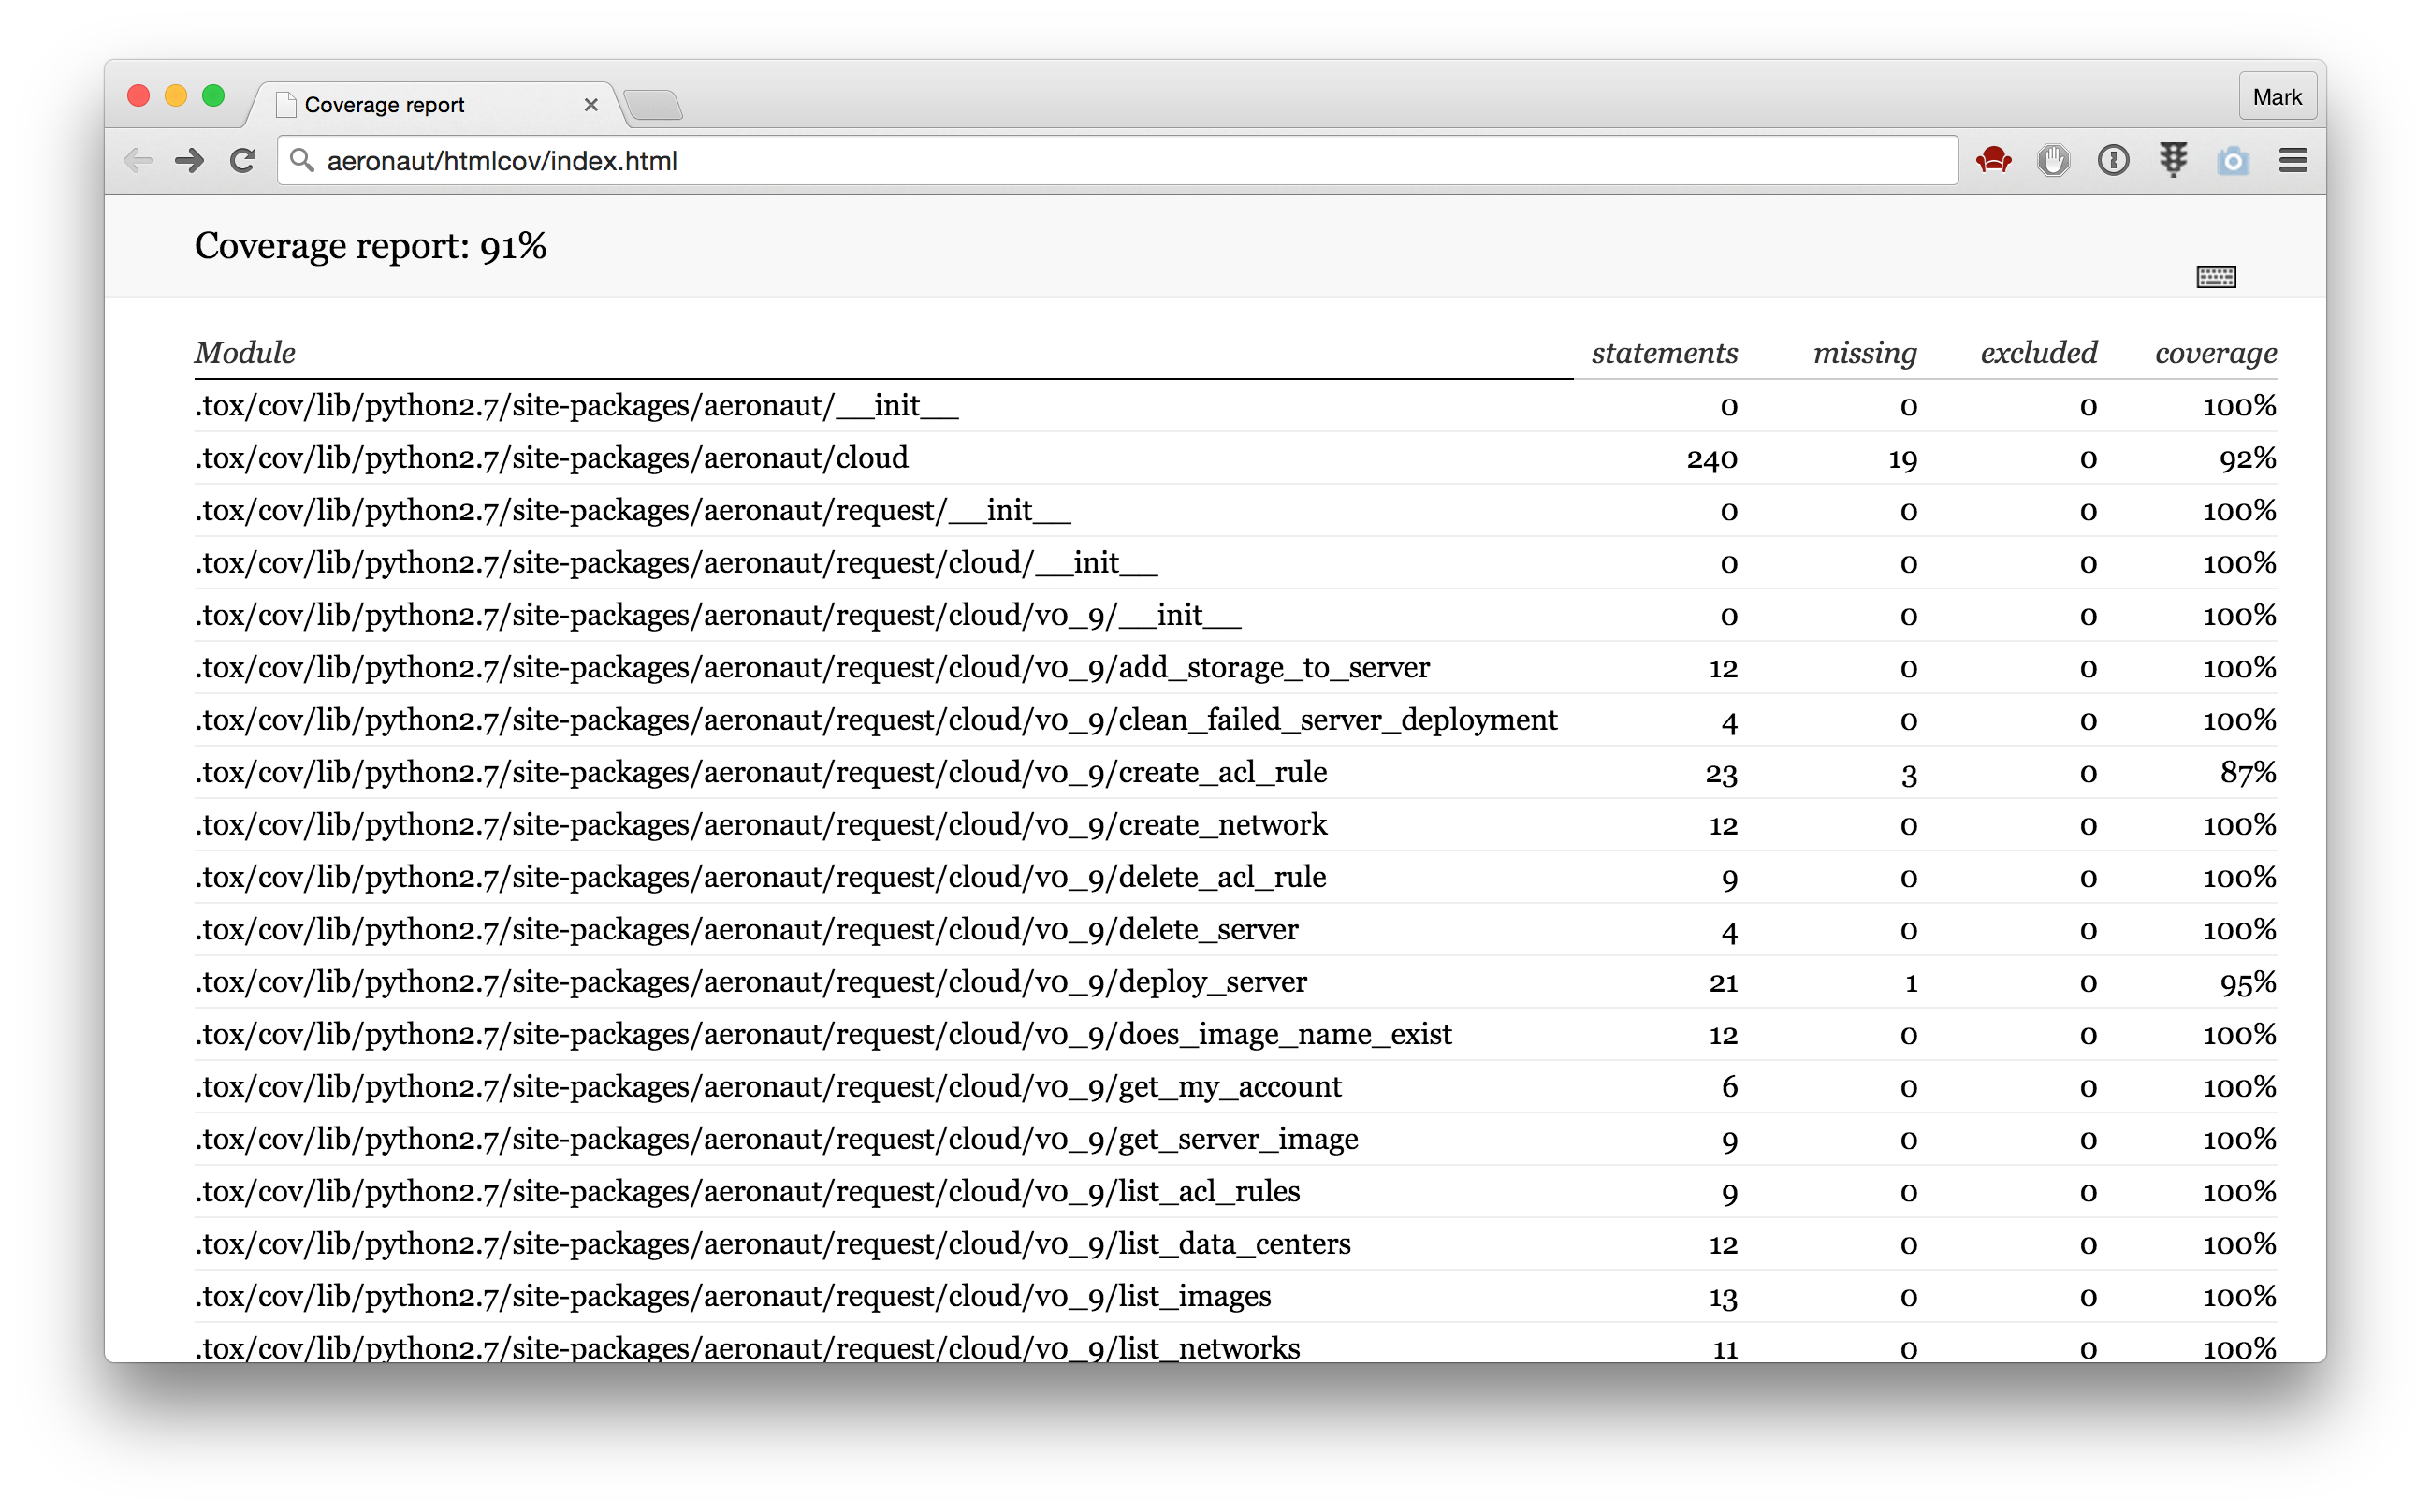
Test Coverage
As usual, I make use of test coverage as one of many ways to know what tests I might be missing. My TDD workflow above incorporates the generation of these reports.

Git
Finally, when I’m happy with my code, I move to the lower right tmux pane
to commit my changes to git. I use either git push to push to Github or
git review to submit to our internal Gerrit instance. At this point the
CI process will start which will either be Travis for my Github projects
or Jenkins for internal ones.
Managed Configuration
While it’s true that it took a few days to get this set up, the upside is that all the set-up can be codified and, therefore automated. So now, I have my dotfiles and setup scripts in my Github account ready for me to download to any other workstation should I need to.
References
I’ve only started working with Tmux and Vim for about 3 weeks now but already I feel more productive and better equipped than ever. To jumpstart my learning, I used these references:
- tmux: Productive Mouse-Free Development
- vimtutor: Built in tutor inside Vim! Just run
:vimtutor - Practical Vim: Edit Text at the Speed of Thought
- Stack Overflow